|
BUILDING THE SEAGULLS |
 |
I made three fibreglass seagulls. Each one in a different pose. Unfortunately
I didn't photograph every gull at every stage of the process so these
photos are a bit of a hotch potch |
|
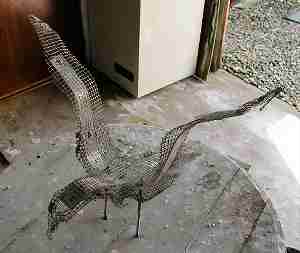
The wire armature in preparation to make the
clay original |
|
 |
The armature covered with clay which I then sculpted.
Hammer for scale
By the way that's the top of a Bushmills Whiskey barrel I'm working
on. No barrel unfortunately, just the top. |
| |
|
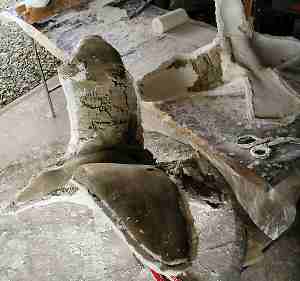 |
I covered the clay original with a thick layer of plaster of Paris bandage
and once set, cut it open. One half of this cast is in the background,
lying on its back with some
of the clay still stuck in it. The foreground section is still waiting
for the clay to be dug out, but you can see some of the wire armature showing
through the far wing. |
Once both halves of the cast were clean I then lined them
with release agent and got stuck into fibre-glassing them. No photos
I'm afraid, for when I use the words "stuck in" I mean this literally
for
it is quite a sticky performance with the various chemicals involved
and I didn't want to take my rather expensive camera anywhere
near this part
of the operation.
First on was a wax release agent, then a gel coat layer followed by
a surface tissue of fibre glass followed by three layers of general 300
gm fibreglass.
All
this was
applied
using a resin which had been 'energised' with a catalyst. All very technical
with rubber gloves and masks. Because of the fumes, I worked in the
garage with the doors wide open. I think the neighbours thought I was
making
weapons of mass destruction with
all
this paraphernalia
involved. |
| |
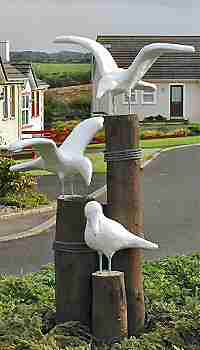
| Once the two halves of each gull had been made they were
joined together and then given a final white coat of gel coat resin. I'd
tell you about how the legs are fixed into the body but this is getting
too detailed so won't bother. |
| It was at this stage, with the three gulls ready to take
their place outside, that I decided I should prepare more moulds in case
something
should happen to these fibreglass originals. So it was back to the chemicals
again to make fibreglass moulds this time. And I used the fibreglass gulls
as my originals (the clay ones having been broken up in the original mould-making
operation) I did take a couple of photos of this operation, only this time
there is a slight change. As I was working on the 'wings folded'
gull this meant a three part mould to enable me to release the cast once
made. |
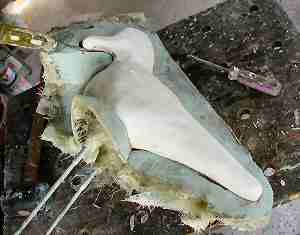 |
Here are two parts of the three-part moulds There is one section which
encases the body where the legs emerge and the other which is the right
side of the 'bird'
The screwdriver is being used to gently part the original
from its mould. Both moulds have yet to have their edges cleaned up. |
| |
|
 |
And here are the three parts of the mould. Hard to see where the "leg"
mould joins the other, so I have marked the join with a red arrow. |
| Yes I am very proud of my seagulls. But they did take a
huge amount of time and effort to make. |
| << Return to sculptures page one |