TREES Page three
How I go about painting trees and forests on Backcloths; Flats and Wings.
LET'S START PAINTING For the purposes of this article I'm assuming a fairly open woods. i.e. not dense.
Once I have transferred the original layout onto the backcloth or wing, I then mark the main elements with masking tape. I then start painting the background. I can paint this background all over the cloth/wing knowing the main elements are now preserved by the masking tape.
The background is where I 'describe' the aerial perspective of my scene. I work as fast as I can so that I'm working wet in wet, a watercolour term, and can put in misty, out of focus, degraded, colour tree trunks and foliage.
I then removed the masking tape before the paint is dry. Trying to remove masking tape once dry is very hard on the finger nails!
If you're forest is to have both a set of wings and a back cloth, paint all at the same time to retain the similar colours.
PROFILE EDGES ON FLATS/WINGS
With the exception of the horizon at sea, nature hates straight lines. (Japanese gardeners believe that evil goes in straight lines.) So when it comes to natural exterior scenes- countryside, caves; woods; what have you, it makes for more realism if you can contrive to make the wing edges irregularly shaped. I do not use canvas flats/wings but hardboard or (my favourite) 4mm plywood. Hardboard is cheaper than ply but also heavier.
By having unusual edge shapes it also helps disguise the gaps between the wings. I get a little kick out of actors emerging from between tree wings that look as if they have all been painted on the same plane.
As well as making an attractive silhouette, lighting people will quickly discover that an irregular profile edge also casts an interestingly shaped shadow.
HINT Make the ''F1at'' edge wider than anticipated. Then paint your tree shape and only AFTER the painting is finished cut out the edge. The cutting-out is usually done with a powered jigsaw.
lt's best if you, the artist, does this cutting-out. Only YOU know what line to take. Willing helpers are inclined to stop every few feet with an exasperated cry of ... ''And just where am I supposed to go next?”
I had a rush job for a TV company once. They wanted me to paint three life sized apple trees in blossom. ''We'1l have as much prepared for you as possible'' they said. Oh yes they were certainly prepared. They had fixed sheets of 1/2 inch ply together to form a large board about 16 ft high and 12 ft. wide. (They made three of these) Then projected a slide of a tree and traced around every branch and cluster of blooms. They then had laboriously cut out with a jig saw all around their tracing, including all the hundreds of holes within the foliage and boughs. So I was forced to stick to their cut-outs when painting.
Start with a blank area. Do your painting. THEN cut around it. So warn the scenery makers of this extra board edge required before they start building. Incidentally tip your jig saw slightly to one side so that the shoe does not leave a snail trail on your nice painting. |
 |
SKY HOLES
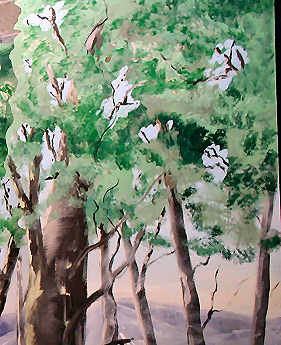
- Establish and paint this at the start, then paint your foliage around it.
- Or, once your foliage is painted, paint the sky-hole on top of the foliage. This seems a cack-handed (artistic term) way doing things but it works surprisingly well. The edges of your sky-hole should be appropriately jagged to show the leaves bounding the hole.
Watch where your main trunk and branches should grow. I've sometimes put in a skyhole where the truck should be but thankfully noticed the mistake before the scenery was completed.
APPLYING FOLIAGE
Don't paint every leaf. You are hinting at foliage. The audience will understand and unconsciously assume they are looking at a tree with leaves, especially if you have included other pointers... Sky-holes. boughs peeping through, grass around the roots etc.
Sponge
The sponge is my favourite painting device for foliage (and stone work too). Get a large sponge and tear it half. Tear, not cut, you're after a ragged face on both exposed surfaces
Now dip the ragged face of your sponge into the main base colour of your leaves. Then dip the same colour-laden sponge into a lighter version of that colour. Jab or pat (don't smear) your sponge onto the canvas or board where you want your leaves to be.
Experiment as you go, overlap, use different colours, work wet-in-wet (that's my favourite), work dry. Consider your foliage in blocks so have the bottom of the block dark to emphasise the form.
Wash your sponge out as soon as you have finished with it because otherwise the pores get clogged and solidified.
HINT Mix yellow and black to make a nice dark velvet green.
Foliage Brush
I love this brush but, strangely enough, rarely use it as I paint most of my foliage with a sponge or a large brush.
I bought this brush from Roscos many years ago. I think it's called a fitch. The bristles of this one, as you see, are round in shape and about an inch wide with a nice foot long handle.

The foliage brush I use on the edge of a block of leaves to show separate leaves. The brush is designed so that one flick of it (one stroke) gives a nice single leaf. But don't try painting every single leaf. You would be at it for months.
To use this brush I usually dip the brush into the main base colour of my leaf, then, with that colour still on the brush, dip the tip into a lighter version. This means each brushstroke gives me a leaf with the sun apparently striking the end of it.
I've said it before in these pages. Do not use the colour straight out of the tin from shop but decant some into another container. I use oval plastic ice cream tubs. If you dip the brush into the original tin. You will invariably taint and degrade that colour.
You need to wash out your brush frequently because eventually both colours will meld together in the bristles and become one, which defeats the object of two colour painting.
5 inch brush.
Rarely used for foliage as I prefer the other two methods. Try a big brush for yourself. Experiment with colour, overlaps, etc. As usual with foliage I inevitably put to colours on the same brush.
PAINTING FOLIAGE ON FIR TREES. Now in this case I DO use my five inch brush. Laden with a very dark green I paint in the fronds (needles) with single strokes trying to emulate the direction in which they are growing from the branches. And of course I use the old "two colours on the same brush" technique to have light areas. As can be seen from this detail, fir foliage also makes a great frame for a cloth. |
 |
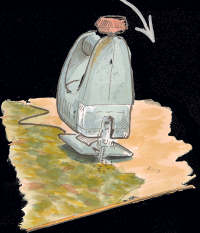
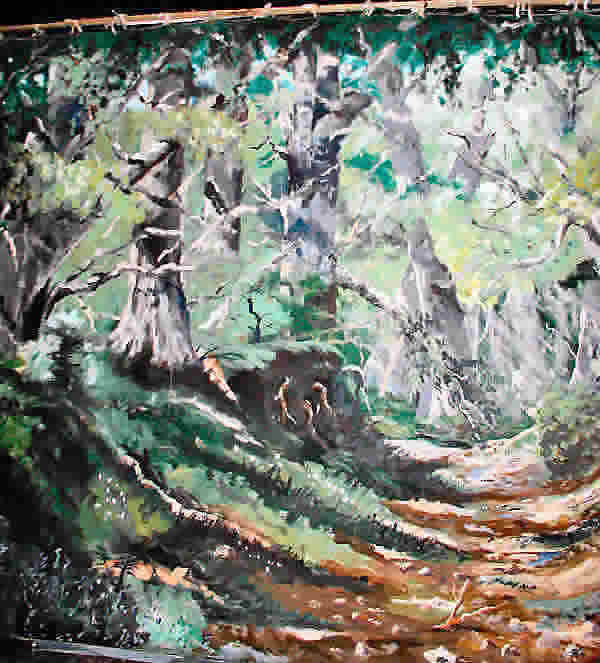
Detail the road to the mine. Snow White |
|
AERIAL PERSPECTIVE
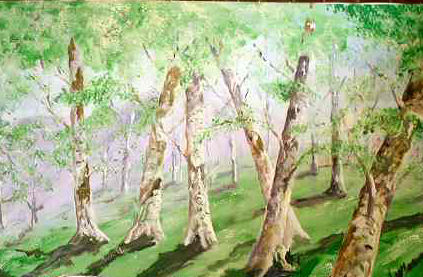
The reason things look different in the distance compared with those close up is that you are looking through the dust in the atmosphere and this dust filters the colours, making them look degraded and out of focus. So we need to paint distant trees more of a blue, gray, mauve colour. And certainly don't have any detail.
Then ONCE DRY I put a layer of translucent white over them.
LIGHT SOURCE
The sun of course, but you can have other mysterious sources which can be placed anywhere (see photo below). Also see the camp fire on the next page.
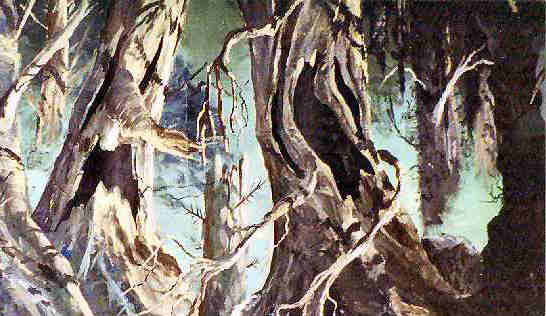
Sunlight striking our trunk or branch gives a wonderful lift to a painting. Especially little dabs of sunlight on branches which give a lovely dappled effect.
HINT
Sunlight filtered through the leaves of trees always hit the ground as an ellipse.
(I read the reason for this once - can't remember what was said!)