As I see it, there are least three ways to make this thing.
1/. All canvas (Or calico which is cheaper - Calico not recommended for something which is going to be rolled up lots of times but OK for this one of project). The canvas to be attached to a long pole which in turn is hung above the door. The problem with this solution is the canvas will curl at the edges. In professional theater scenery, canvas with cutouts- foliage for instance- is mounted on a net which is invisible to the audience. Can't do that here.
2/. Canvas mounted on a timber/lumber frame. Good idea but you have to make the arch and any other profile edges out of board for strength and attach (glue/staple) the canvas onto that.
3/. Make the whole thing out of timber frames covered with a very thin (4mm) plywood. I would go for this solution as it means a rigid structure which can have interesting profile edges and can be made in sections which can be bolted/screwed/nailed together on site.
The bottom of an arch proves a problem with built scenery (and door frames as well) and in the theatre is solved by running a very thin metal bar along the floor from one side of the opening to the other and screwed up underneath. Custom bars can be bought from theatrical suppliers and often have a rounded top to help stop actors tripping over them.
Now nail your panels into place, overlapping if you wish. The 2"x1" is nailed thin edge to the panels for rigidity (not flat against the panels)
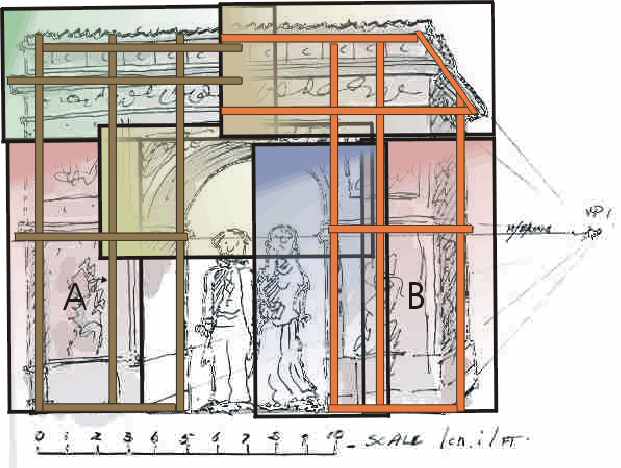
You will then end up with two flats looking like this..

Actually I have only done the right side for you to see what I mean. Things to note:-
- In reality the grey panels are in front of this frame. Not behind it as drawn here.
- The panels protrude a couple of inches over the framing all around, apart from the bottom. The panels are not cut out exactly yet.
- The frame timber protrudes in places to help support the protruding pieces of the "arch masonry".
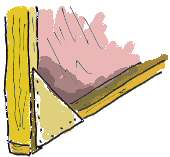
- The blue triangles are off cuts of the same ply nailed across joints at the back of the framing to help the rigidity. You can have lots of these at every corner.
- Note no curved arch panel. Because this is a one-off occasion and because I want the back to be clean and neat for the audience to walk through, I have tried to avoid any support laths being seen. So this arch curve panel will be nailed onto the finished flat once it is built at the School.
- Paint the back of this arch-board white so it easily visible. Or perhaps a "Welcome" sign?
- The overlap of the top boards and laths helps rigidity
- You might have to nail a couple of temporary diagonal laths of wood across these two frames as they will probably wave about and warp when being transported.
PAINTING AND CUTTING OUT. Note the order. Paint first, then cut out after. Lay out your two flats on the floor. Face down. Temporarily bolt them together. Turn it over (Dodgy moment as it is vulnerable at this stage) Now prime the panels with a solution of paint, some water and some PVA glue and a little colour (I use red). This colour helps me see when this mixture is well mixed. Also gives me a pinkish base colour on which to chalk lines. Also lay out the separate "Arch-curve " panel on the floor and prime this with the same solution. Allow everything to dry overnight. Now lightly nail the arch-curve into place .I then usually lift the whole thing up and lean against a wall. Although you can attack it still lying on the floor. Now chalk on the one foot grid and then transfer the scale lines from your sketch. Put in just the important lines - the rest (the relief sculptures etc.) can be done freehand later. Now away you go and paint the thing.
JIG-SAW Once the painting is finished and dry THEN take a jig saw to it and cut out all around the painting. You'll probably then have to sandpaper these rough edges. Now take the three sections apart and transport it to the school and assemble. Praying that your door measurements were correct! Screw on the thin metal bar along the opening under the flats.
Beware, this arch is going to be quite heavy so make sure there are good supports (hooks, ropes etc.) to hold it up. 'Don't want a youngster being hit on the head.
Chris, I hope the above is of use. Let me know how you get on
regards
Brian