This
page was last updated on |
08-Jun-2007
|
MAKING A "BUSH" BOOK-FLAT
 |
MATERIALS I assume you are using hardboard for this project. 4 mm plywood
is lighter, more robust but, unfortunately, dearer. |
SEALING
Put a cover (PVC?) on the floor to stop paint damaging it, then lay the
two sheets of hardboard, bobble side up, on top of it. Unusually I always
use the bobble side of hardboard as my painting surface. Now make up your
sealing solution. I use the following ingredients: -
20 parts of cheap vinyl matt white emulsion paint.
One part water.
Two parts PVA glue.
And a teaspoon of vinyl matt red emulsion paint.
(There is no need to be too precise with these quantities)
Stir the above until the colour becomes an even pink, then paint the
hardboard and leave to dry overnight. You only have to seal one side of
each sheet – in this case the bobble side.
Beware, if you wait until the hardboard is fixed to the timber supports
before you seal it, the boards will warp. So always seal first.
TIP: Never store hardboard directly on a concrete floor.
The hardboard will absorb any dampness in the concrete.
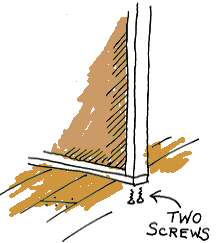
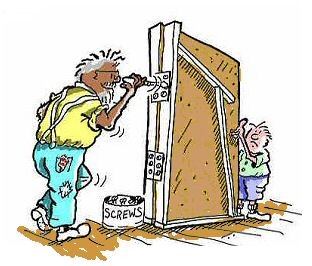
SUPPORTS Note how the upright sits on the bottom rail, rather than the other way around. This is done deliberately as there is less chance of the flat catching on the floor when being run across the stage whilst moving the scenery. (See cartoon below) |
 |
SCREWS AND NAILS
The side and bottom supports are screwed together and the hardboard nailed
about every nine inches. Some companies also glue the hardboard to the
supports but I don’t bother as it makes it easier to dismantle the
timber later for use when building for the next show.
Now I temporarily join the two flats together either with big nails (leave the heads proud for removal) or “G” clamps, and lean the structure against a wall, face out. You will probably find you need to support the unsupported sections with scrap lengths of batten.
MARKING OUT,
Mark out the main outlines of your ‘bush’. Here you will discover
the value of having the boards sealed with a light pink colour, as white
chalk will show up. Of course you don’t have to use chalk, - charcoal,
or paint will work just as well. I use big chunky ‘pavement chalks’
MORE SUPPORTS AND HINGING When putting on the two hinges, depending upon the type of hinges used, you might find you need to put them on back-to-front, screwing through the un-countersunk (flat) side of the hinge. |
 |
"With
the help of an assistant" |
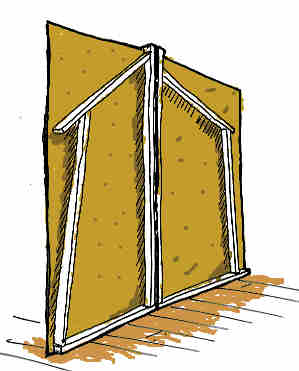
BACK VIEW And this is how the back will look once completely opened up (In reality this bookflat will never be opened fully like this.) The hinges are not visible as they are sandwiched between the two inside edges.
|
 |
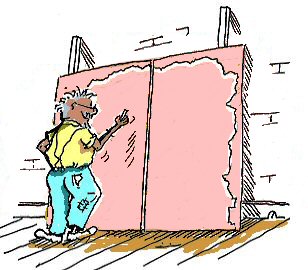
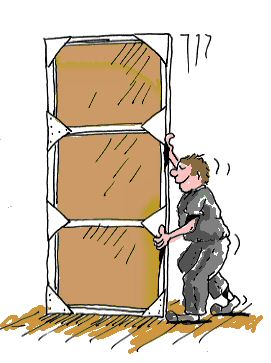
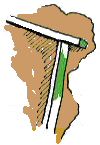
OPTIONAL CORNERS However, with a ‘bush’ this small I don’t think it necessary. Cartoon on the right shows a stagehand running a flat which has plywood corners fitted. In order to stabilise a flat when moving in this manner, have one hand as high up as convenient. I also wear safety boots. (Steel toes caps but rubber soles for quietness) You haven't lived backstage until you have had a hardboard flat land edge-on on your toe! Note also the traditional black clothing. |
 |
DUCHMAN
Place your book-flat; face forward and wide open; against a wall and glue
(PVA) a six inch wide strip of canvas down the front face of the exposed
crack. In theatrical parlance this strip is known as a duchman.
This not only stops the unsightly gap being seen but also avoids light
spilling through from the back. I augment the glue with staples along
the edge of the canvas. For this I use a heavy-duty staple gun because
hardboard is, well, - hard board! Remember to bend over the exposed ends
of the staples.
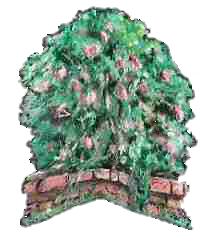
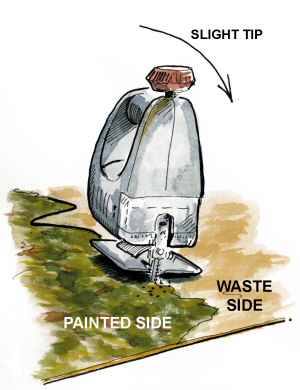
PAINTING and JIGSAW Once the glue has set I can at long last start painting the 'bush' properly, taking the work almost to completion. When my painting has dried, I cut out the profile edges with a powered jigsaw. TIP :- If you discover the shoe of the tool is leaving a shiny trail, try tipping it ever-so-slightly to one side as you work, so the edge of the shoe only marks the waste side of the hardboard.
|
 |
|
Drawing © Brian
Willis |
 |
PAINTING THE BACK SUPPORTS Nearly done. This drawing shows the back of the flat where I paint any surface of the supporting timber which comes near the edge. This helps to disguise it if/when seen by the audience. |
Now your ‘bush’ is ready to take its rightful place on the stage. A book-flat is usually set on stage in the partially open position. If you do not open the ‘book’ completely there is no need for any other supports. Interestingly, quite often the audience is not aware that it is a hinged ‘book’ but sees it as a straight piece of scenery.
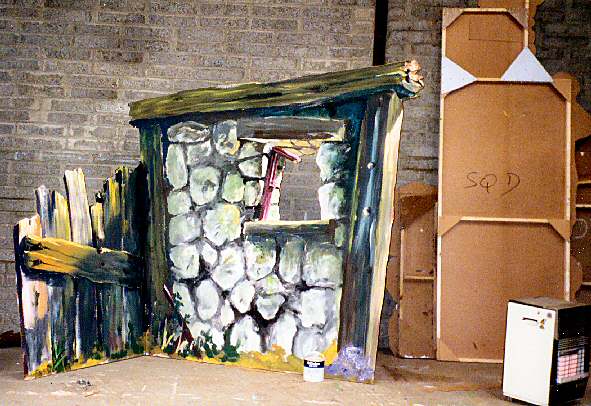
Finally here is an example of one of my book-flats for a "Brigadoon" set. This was made in exactly the same manner as discussed above, with the addition of a hole cut for the window. You can see it is a book-flat by looking at the floor. That's a 2.5 ltr paint tin for scale. Note on the right, the back view of a flat complete with some of those triangles mentioned above. .