WIZARD OF OZ Coleraine 2014 Page two
Constructed by Sean Magee
Designed and painted by Brian Willis
Performed by Coleraine Provincial Players,
in the Coleraine
Town Hall Jan. 2014
THE YELLOW BRICK ROAD cloth
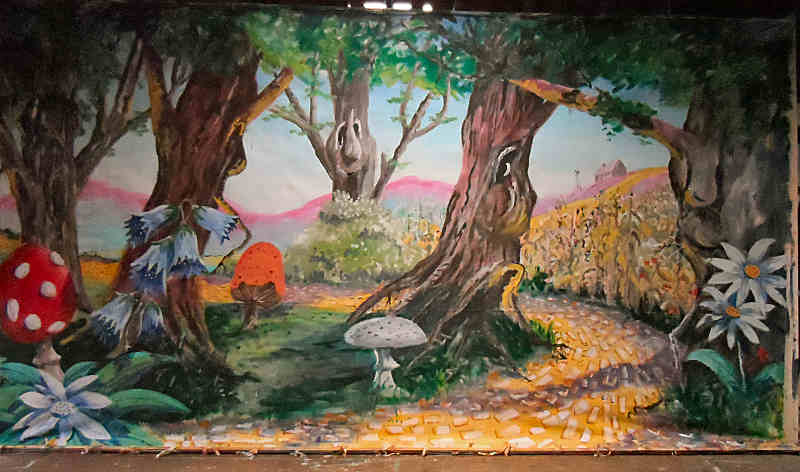
I have hinted at faces on some of the trees.
To get that even, graduated, sky, on my blank canvas I first drew in my trees with charcoal. Not bothering to be too accurate or detailed. I found the position of these trunks by slavishly squaring my original small sketch, then transferring the squares onto the cloth and copying the outlines. I then used masking tape beside these outlines on the cloth. (Not on the charcoal as the tape will not stick) This then "reserved" the tree trunks and I was able to paint the whole sky without stopping at each trunk. I used the watercolourists wet-in-wet technique to blend the sky. Working as fast as I could, I started with a base colour of light blue at the top and as I worked down the cloth so I added more white. Then, whilst the paint was still wet, I removed all my masking tape. Leave it to dry and you'll break your finger nail trying to pick the tape off.

TOADSTOOL DETAIL.
I have included this photo as an example of the craft of scenic painting (Note I am not talking art here)
Red: - Try to have your warmest colours in the foreground.
Shadows: - Decide where your sun is to be. This then determines the position of the shadows. Shadows help to show the shape and (in this case) roundness of the object. Include the shadows cast by other nearby objects which also helps to give depth. (The shadow of the blue flowers in this case.)
Contrast: - Find an excuse to paint contrast. Note the really dark greens behind the stalk which makes it stand out.
Depth: - One way to emphasise depth is to overlap objects. (The green leaves in front of the stalk).
Perspective also helps the illusion of depth and for this cloth I set my Eyeline/Horizon line about a foot off the top of the toadstool and painted the bottom of the cap and the ring around the stalk accordingly.
Wooops: - forgot to whiten the top left "lump"
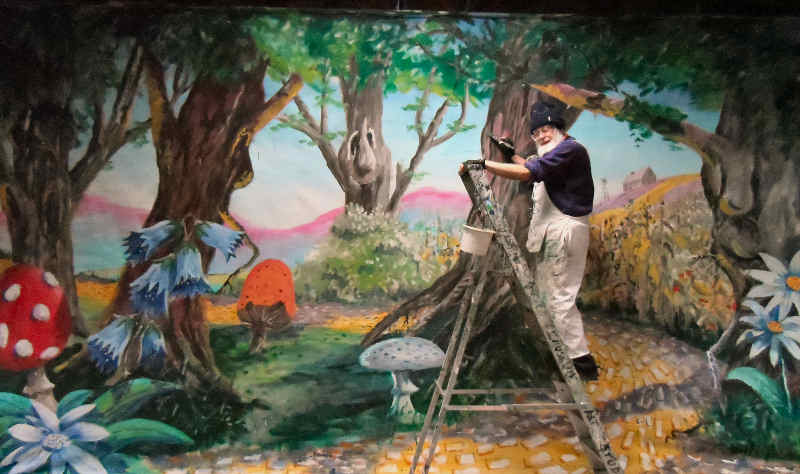
And just to show it's not all done by computers and Photoshop. Above is a pic. of me completing the cloth.
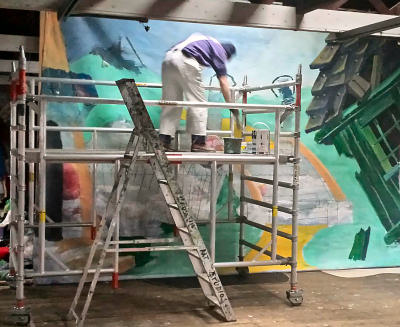
For the higher sections I use a scaffold tower mounted on castors. See "action" photo on the right. Photo shows me starting to block in the colours for the Munchkinland backcloth
Photo by Phillip Kelly